Oven Cleaning in a Simple, Safe, and Effective Way
Oven cleaning is one of those household tasks people often delay until it becomes impossible to ignore. A clean oven does more than improve appearance; it helps reduce smoke, remove stubborn grease, support even cooking, and create a more pleasant kitchen environment. Whether you cook every day or only occasionally, regular oven cleaning can make a noticeable difference in performance and hygiene.
For many households, oven cleaning feels intimidating because baked-on food, carbon buildup, and sticky residue can seem difficult to remove. The good news is that with the right approach, oven cleaning can be manageable, efficient, and far less stressful than expected. From routine maintenance to deep oven cleaning, knowing what to do and when to do it can save time and effort.
In this article, we’ll look at why oven cleaning matters, how to prepare for it, the safest cleaning methods, and how to keep your appliance cleaner for longer. You’ll also find practical tips, useful tools, and common mistakes to avoid so you can approach oven cleaning with confidence.
Why Oven Cleaning Matters
Oven cleaning is not just about aesthetics. Over time, grease, food spills, and burnt-on debris can build up inside the oven cavity, on the racks, and around the door glass. This buildup can affect the way your oven heats and may even create unpleasant odors when the appliance is running.
A dirty oven can also lead to smoke, which may trigger smoke alarms or make the kitchen uncomfortable to use. In some cases, residue from old spills can burn again during cooking, affecting the flavor and smell of your food. Regular oven cleaning helps prevent these issues and keeps your cooking environment more pleasant.
There are also safety benefits. Heavy grease buildup can become a fire risk in extreme cases, especially if food spills are left unattended for long periods. Keeping on top of oven cleaning reduces this risk and supports better appliance care overall.
Signs Your Oven Needs Attention
Not every oven needs deep cleaning weekly, but there are clear signs when it’s time for a proper clean. If you notice smoke during preheating or cooking, that often means residue is burning off inside the cavity. Strong odors are another common clue.
Visible grease, dark patches, and hardened spills are obvious signs that oven cleaning should not be postponed. You may also see dirt along the oven door, inside the glass, or on the racks. When these areas begin to look dull or sticky, the appliance is due for maintenance.
Common signs your oven needs cleaning include:
- Smoke appearing when the oven is on
- Unpleasant burnt smells
- Stuck-on food or grease on the walls
- Darkened or cloudy oven glass
- Uneven cooking caused by buildup
Preparing for Oven Cleaning

Before starting oven cleaning, preparation makes the job smoother and safer. Begin by turning off the oven and making sure it is completely cool. Remove racks, trays, thermometers, and any loose accessories so you can clean each part properly.
Protect the floor around the oven with newspaper or old towels if you expect drips. Open windows or switch on ventilation to improve airflow, especially if you are using commercial oven cleaning products. Good airflow helps reduce strong fumes and keeps the room more comfortable.
It is also helpful to gather supplies before you begin. Having everything ready means you can move through the task without interruption. A little preparation can make oven cleaning much easier from the start.
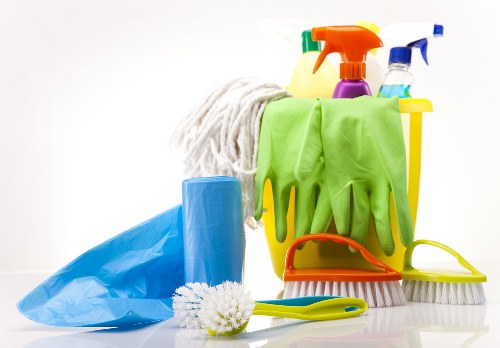
Helpful Supplies to Have Ready
- Soft cloths or microfiber towels
- Non-abrasive sponge
- Baking soda
- White vinegar
- Warm water
- Dish soap
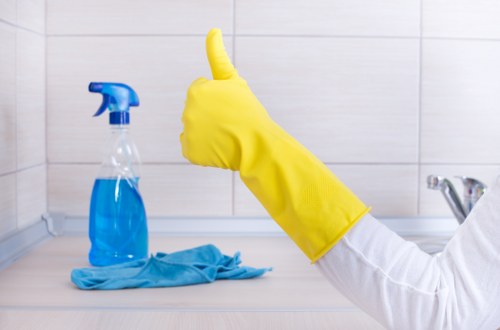
- Rubber gloves
- Plastic or wooden scraper
Natural Oven Cleaning Methods
Many people prefer natural oven cleaning methods because they are simple, affordable, and less harsh than chemical alternatives. Baking soda and vinegar are the two most popular ingredients used for a safer approach to removing grease and grime.
To use this method, mix baking soda with a little water until you form a spreadable paste. Apply it to the inside surfaces of the oven, avoiding heating elements and fan openings. Leave the paste to sit for several hours or overnight so it can loosen baked-on residue.
After the paste has worked, spray or wipe the surfaces with white vinegar. The reaction helps lift loosened dirt, making it easier to wipe away. This method is especially useful for routine oven cleaning and for ovens that are dirty but not heavily neglected.
Steps for a Baking Soda Approach
- Remove oven racks and accessories.
- Mix baking soda and water into a paste.
- Apply the paste to interior surfaces.
- Leave it overnight or for several hours.
- Wipe away residue with a damp cloth.
- Spray vinegar if needed for stubborn spots.
- Finish by drying the oven thoroughly.
Tip: If you want oven cleaning to stay manageable, repeat a light natural clean before grease has time to harden.
Using Commercial Oven Cleaning Products
Sometimes a natural method is not enough, especially if the oven has heavy grease, burnt spills, or months of buildup. In these cases, a commercial oven cleaning product may be more effective. These products are designed to break down stubborn residue faster and with less scrubbing.
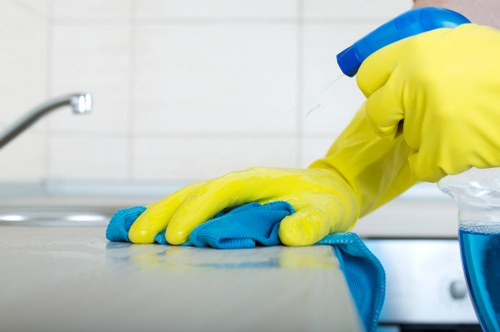
When using a chemical oven cleaner, always read the label carefully and follow safety instructions. Wear gloves, ensure proper ventilation, and avoid applying product to self-cleaning coating surfaces unless the manufacturer approves it. Some cleaners are made for specific oven types, so compatibility matters.
Commercial oven cleaning can be highly effective, but it should be used carefully. Too much product or improper use can leave behind residue or damage sensitive surfaces. Always test carefully and avoid mixing products.
Best Practices for Safe Use
- Read the instructions before applying
- Wear protective gloves
- Keep windows open for ventilation
- Avoid heating the oven immediately after cleaning
- Wipe away all residue fully
- Store products away from children and pets
How to Clean Oven Racks
Oven racks often collect grease and burnt-on food, so they should be cleaned separately for best results. A sink, bathtub, or large container can be used depending on the size of the racks. Soaking helps loosen residue before scrubbing begins.
Fill the chosen area with warm water and a little dish soap. For extra cleaning power, add baking soda or a small amount of vinegar. Leave the racks to soak for at least 30 minutes, or longer if the dirt is heavy. Then scrub using a non-abrasive sponge or brush.
Once the racks are clean, rinse them well and dry them completely before placing them back into the oven. Proper drying helps prevent streaking and keeps the oven cleaning process neat and effective.
Rack Cleaning Tips
- Soak racks before scrubbing
- Use non-scratch tools
- Avoid harsh metal scourers
- Dry racks fully to prevent marks
Note: Regular rack cleaning helps reduce the amount of residue that transfers back into the oven cavity.
Cleaning the Oven Door and Glass
The oven door is one of the most visible areas and often shows fingerprints, grease splashes, and cloudy streaks. A clean door improves the overall look of the appliance and makes it easier to check food while cooking. Oven cleaning should always include the glass and edges around the door.
For light dirt, warm soapy water may be enough. For stubborn marks, a baking soda paste can be applied gently to the glass. Let it sit for a short time, then wipe it away with a damp cloth. Be careful not to use abrasive pads that could scratch the surface.
If your oven door has a removable glass panel, check the manufacturer’s instructions before taking anything apart. Some models are designed for easy access, while others should not be disassembled at home. When in doubt, keep the cleaning external and simple.
Door Cleaning Reminders
- Use soft cloths only
- Clean edges and handles too
- Avoid harsh scraping on glass
- Dry the door for a streak-free finish
Self-Cleaning Ovens: What to Know
Some ovens come with a self-cleaning function, which can simplify maintenance. This feature usually heats the oven to a very high temperature to burn away food residue and turn it into ash. After the cycle ends and the oven cools, the remaining ash can be wiped away.
Although self-cleaning sounds convenient, it still requires caution. High heat can produce strong odors and sometimes smoke, especially if the oven has large amounts of grease. It is also important to remove racks and accessories if the manufacturer recommends it.
Self-cleaning can be part of a routine oven cleaning schedule, but it is not always enough on its own. Many people still need to wipe the interior and clean the door afterward for a polished result. Check your appliance manual before using this feature.
Advantages of Self-Cleaning
- Reduces manual scrubbing
- Breaks down baked-on residue
- Can help with routine maintenance
Possible Drawbacks
- High heat and odors
- Long cycle times
- Not suitable for every oven model
Common Oven Cleaning Mistakes to Avoid
Many oven cleaning problems come from using the wrong tools or rushing the process. One of the most common mistakes is scrubbing with abrasive pads that can scratch enamel or glass. Another is using too much liquid, which may seep into electrical areas or create streaks.
Some people also forget to let cleaning products sit long enough to work. If residue is not softened first, the scrubbing effort becomes much harder. On the other hand, leaving chemicals on longer than recommended can damage the finish. Balance and caution matter.
Never mix different cleaning products unless the label specifically allows it. Combining chemicals can create dangerous fumes or reduce effectiveness. For safe oven cleaning, follow the instructions carefully and take your time.
Mistakes to Watch For
- Using metal scourers on delicate surfaces
- Cleaning a hot oven
- Mixing cleaning chemicals
- Forgetting to ventilate the room
- Skipping the final wipe-down
How Often Should You Clean Your Oven?
The right oven cleaning schedule depends on how often you cook and what types of food you prepare. If you use the oven daily, a light wipe-down every week and a deeper clean every few months may be ideal. For less frequent use, monthly checks may be enough.
Homes that roast meats, bake casseroles, or prepare oily foods may need more regular cleaning because spills happen more often. Keeping up with small messes quickly is one of the easiest ways to prevent larger buildup later. A little maintenance now can save a lot of time in the future.
The best oven cleaning routine is the one you can realistically maintain. Consistency matters more than doing everything perfectly at once.
Simple Frequency Suggestions
- Weekly: quick wipe of obvious spills
- Monthly: light cleaning of the cavity and door
- Every 3 months: deeper oven cleaning
- As needed: rack soaking and stain removal
Tips to Keep Your Oven Cleaner for Longer
Once your oven is clean, a few habits can help keep it that way. The easiest habit is to wipe spills quickly after the oven cools. Fresh spills are much easier to remove than burnt-on residue, and this small step reduces the need for frequent deep cleaning.
Using baking trays or oven-safe mats can help catch drips from pies, casseroles, and roasted dishes. These simple tools reduce mess and make maintenance easier. You should also avoid overfilling dishes, as bubbling sauces and oils are more likely to spill when trays are packed too full.
Another useful tip is to inspect the oven after particularly messy meals. A quick post-cooking check can prevent residue from hardening. With a little consistency, oven cleaning becomes less of a chore and more of a simple household habit.
Preventive Habits That Help
- Wipe spills once the oven is cool
- Use trays to catch drips
- Do regular light cleaning
- Avoid overcrowding dishes
- Check the oven after heavy use
When to Consider Professional Oven Cleaning
Sometimes oven cleaning becomes too time-consuming or difficult to handle alone. If the buildup is heavy, if the oven has not been cleaned in a long time, or if there are delicate components you do not want to risk damaging, professional help may be a smart choice.
Professional oven cleaning services can remove stubborn grease, baked-on grime, and hard-to-reach residue with specialized tools and products. This can be particularly useful for busy households, rental properties, and ovens that need a serious reset. It also helps save time and effort when you want dependable results.
If you have tried several methods without success, or if you simply want the job done thoroughly, it may be the right moment to book your service now. Professional oven cleaning can restore the appliance’s appearance and performance while reducing your workload.
For households that value convenience and cleanliness, contact us today to arrange an oven cleaning service that fits your needs.
Situations Where Professional Help Makes Sense
- Heavy grease and smoke buildup
- Strong odors that won’t go away
- Time constraints and busy schedules
- Commercial-style or specialty ovens
- Ovens needing a deep reset
Conclusion
Oven cleaning is an important part of home maintenance that supports better cooking, cleaner air, and a more efficient appliance. Whether you prefer natural methods, commercial products, or professional assistance, regular care makes the task easier and less overwhelming over time.
By removing grease, tackling spills early, and following safe cleaning practices, you can keep your oven looking and working better for longer. The key is to stay consistent and choose the oven cleaning method that suits your home, schedule, and appliance type.
If your oven is overdue for attention, now is a great time to take action. Book your service now or make oven cleaning part of your regular routine so your kitchen stays fresh, safe, and ready for everyday cooking.